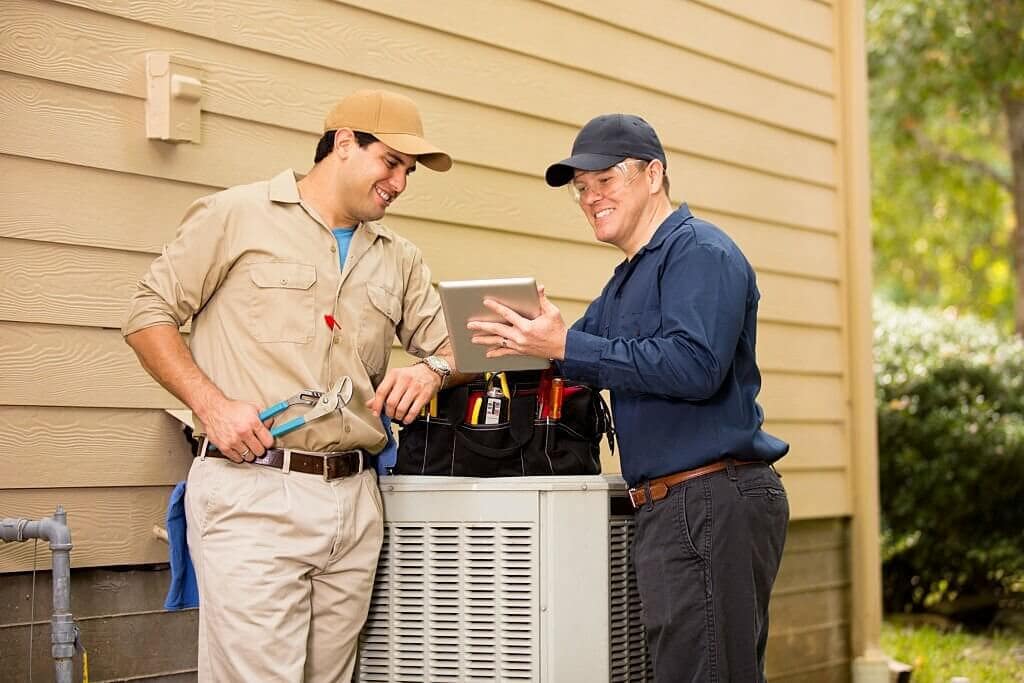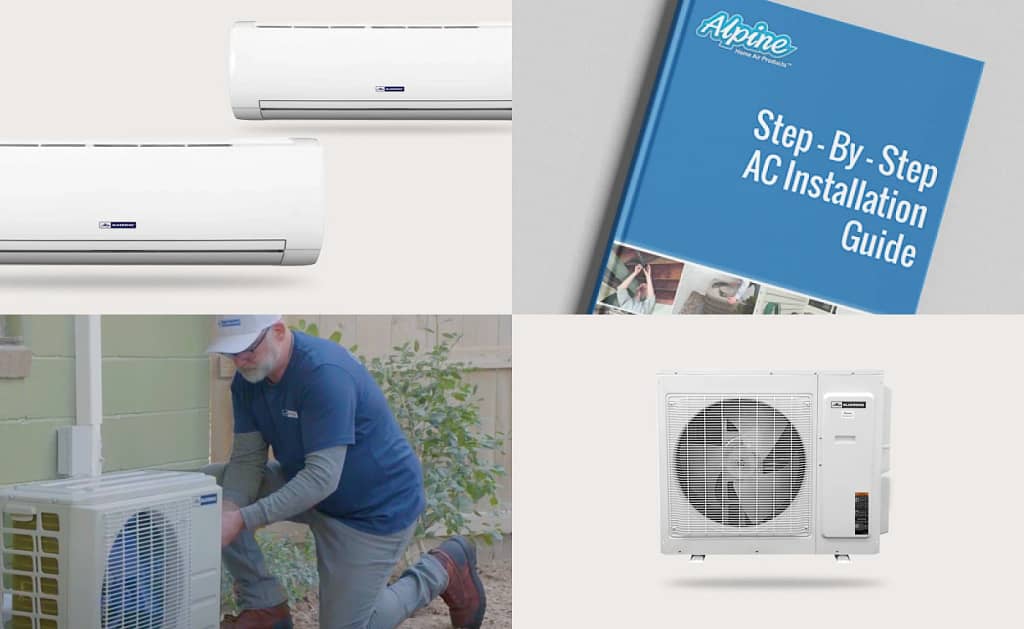
Are you thinking about installing a ductless mini-split? Many of our customers choose to do the majority (90%) of the installation themselves and then hire a pro for the final start-up. Our DIY mini-splits allow customers to complete 100% of the installation independently.
In this article, Alpine’s HVAC experts explain four easy steps for installing a single-zone mini-split system with a wall-mounted air handler.
Preparing for Mini-Split Installation
Before diving into a ductless mini-split installation, you must consider several critical factors to ensure efficient performance and maximum comfort, regardless of how you plan to use your system and under what circumstances.

Sizing Your Mini Split
Properly sizing your mini-split AC system is paramount.
An oversized system can result in short-cycling, reduced efficiency, and inadequate dehumidification.
Conversely, an undersized system won’t be able to cool your space effectively.
One of the best ways to ensure that your system is neither oversized nor undersized is to conduct a load calculation with professional help or online tools.
An accurate load calculation will help determine the right size system for your needs.

Location and Placement
The location of your indoor unit (or indoor units) and your outdoor unit can significantly impact your system’s efficiency.
For indoor units, ensure you install each unit in a location with unobstructed airflow. This ensures optimal distribution of the conditioned air throughout the room or zone.
Also, take some time to consider the height at which you want the indoor unit to be mounted, assuming you are using wall units.
An optimal height for airflow is typically about seven feet above the floor.
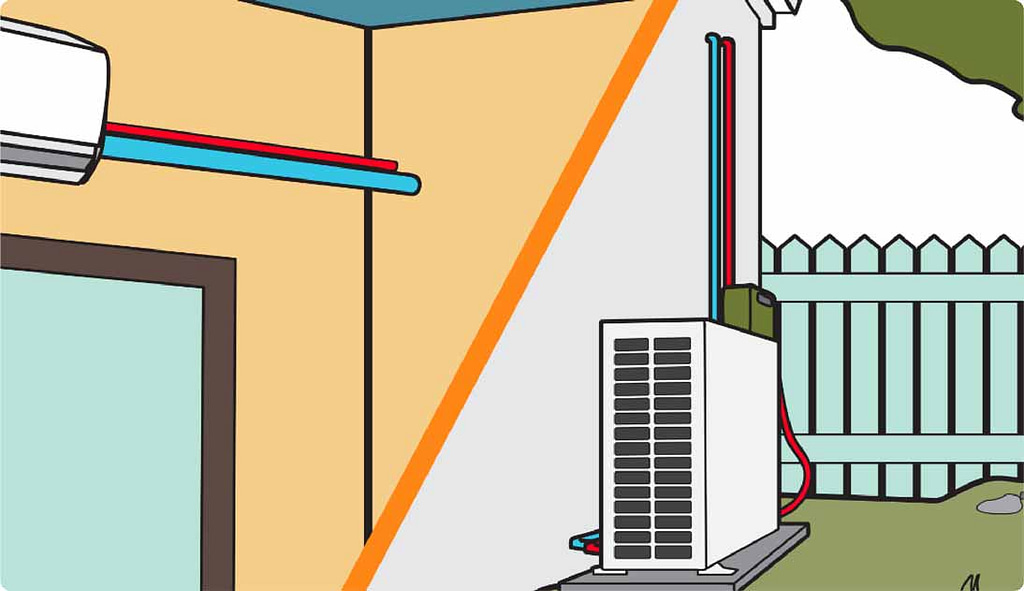
Place outdoor units on a stable surface with ample clearance for proper airflow. To prevent overheating, ensure they are shielded from direct sunlight and excessive debris.

Electrical Requirements
Mini-split systems require specific electrical considerations. To power the indoor and outdoor units, you’ll need a dedicated circuit with the appropriate voltage and amperage capacity.
Most mini-splits are compatible with 220V wiring commonly required by larger household appliances. Some smaller, single-zone systems (12,000 BTU or lower) are configured to run on 110-120V. Make sure to verify your mini-split’s voltage requirements before you begin installation.
Even someone fully committed to a DIY mini-split installation may want to consult an electrician before starting.
A licensed electrician can ensure that your electrical system meets all the requirements and runs smoothly without risks.
Addressing these steps before your mini-split install guarantees years of comfort and long-term use for your home or office’s heating and cooling needs.
How to Install a Mini-Split in 4 Steps
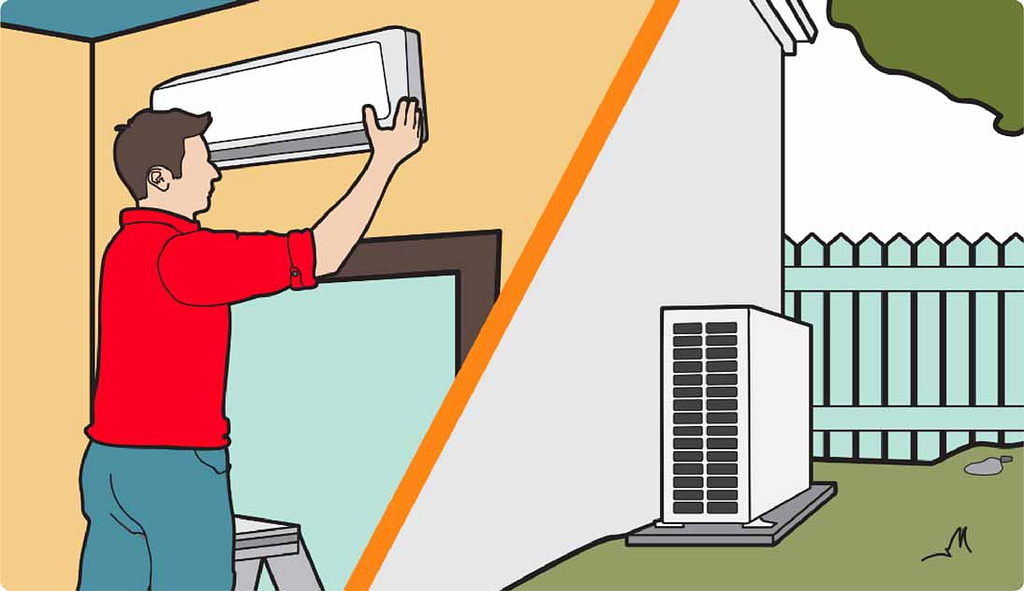
1 Mount
- Outside: Install the condenser on a pad or bracket and in a convenient location.
- Inside: Attach the included mounting plate on the wall where you want to install the air handler.
- Using a hole saw, drill through your wall at a slight downward angle, adjacent to the lower right-hand side of the mounting plate. If desired, insert a wall sleeve.
- Hang the indoor unit on the mounting plate while running the refrigerant lines, wiring, and drain tubing through the hole to the outside.
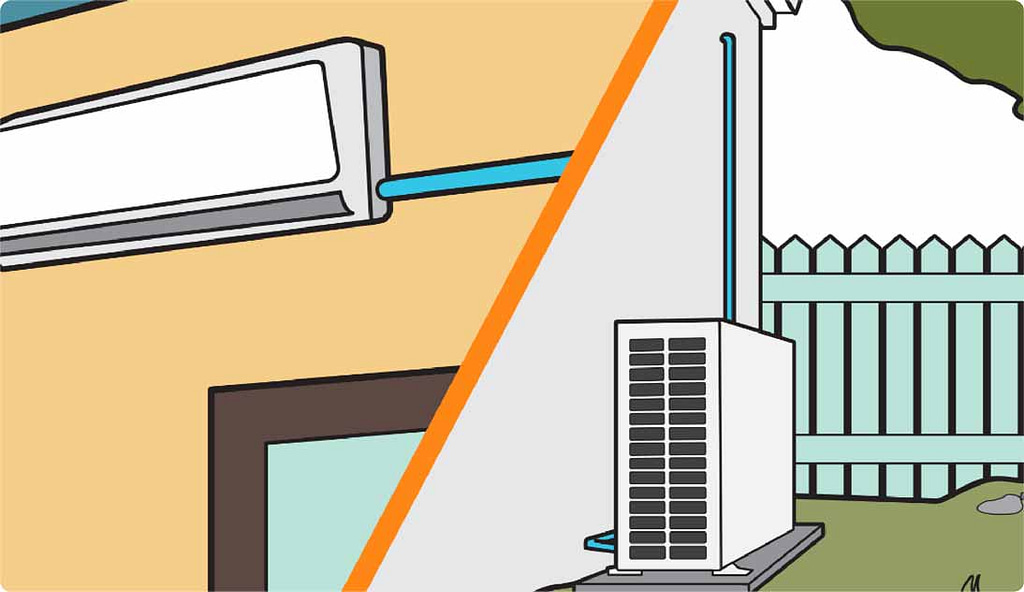
2 Connect
- Using a torque wrench, secure the refrigerant lines to the connectors on the indoor unit first, then the outdoor unit.
- Connect the wiring between indoor and outdoor units. Make sure to match each color of wire to the corresponding terminal.
- Discharge the condensate line away from the wall and to the outside.
3 Electrical
If you are not trained to work with high-voltage electricity, we recommend hiring an electrician for this portion of the job.
- Turn off the power at the breaker box.
- Depending on your particular model, run 220- or 110-volt power from a dedicated circuit on your breaker panel to a disconnect box near the outdoor unit.
- Install an electrical whip (weatherproof power wiring) connecting the disconnect box to the outdoor unit.
- Turn the power back on at the breaker box.
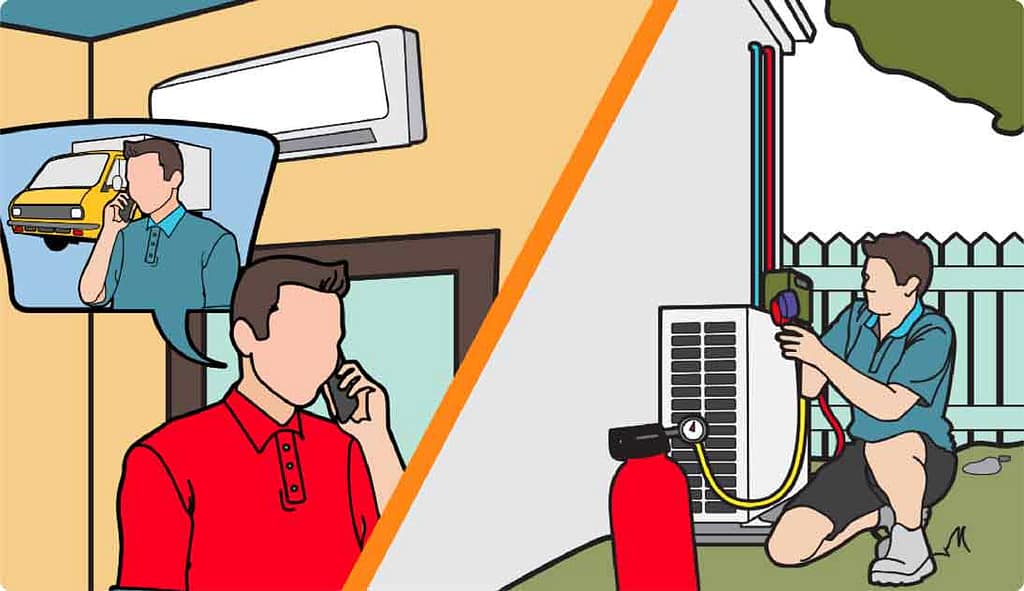
4 Start-Up
A. Conventional Mini-Split: Hire a Pro
Your HVAC contractor will:
- Do a pressure test to check for leaks
- Pull a vacuum on the refrigerant lines
- Release the refrigerant from the condenser into the system
- Add refrigerant if the refrigerant lines are longer than the factory precharge in the system
- Startup and test the system
B. DIY Mini-Split: Self Start-Up
- Release the refrigerant from the outdoor unit into the system using an Allen wrench.
- Check for leaks: Use a spray bottle with soapy water where the line sets connect.
- Retighten the line set connections to the proper torque in case of leaks.
- Turn on the system.
After the Mini-Split Installation
Your ductless mini-split system is up and running. Now what?
As with many home improvement items, a mini-split needs ongoing attention to ensure it continues to work as it should. After the installation is complete, don’t forget the following:
Maintaining Your System:
Once your mini-split system is successfully installed, ongoing maintenance is essential to keep it operating efficiently and prolong its lifespan. Here are some tasks to keep in mind:
- Regular Cleaning: Clean or replace air filters as recommended by the manufacturer. Dirty filters can reduce system efficiency and indoor air quality.
- Coil Cleaning: Periodically clean the indoor and outdoor coils to remove dust and debris hindering heat exchange. Be cautious when cleaning delicate coil fins.
- Check for Leaks: Inspect refrigerant lines and connections for any signs of leaks. If you notice refrigerant leaking, contact a licensed HVAC technician for repairs.
- Condensate Drain Maintenance: Ensure the condensate drain line is clear and not debris-logged. A clogged drain can lead to water damage.
- Lubricate Moving Parts: If your mini-split AC has moving parts, such as fan motors, lubricate them according to the manufacturer’s recommendations.
Though many of the maintenance tasks are things you can tackle yourself, having an HVAC professional do an annual check-up on your system is always a good idea to ensure everything is running well and no hidden issues are present.
Mini-Split Installation Videos
Watch the installation of a conventional mini-split from start to finish:
Watch a DIY mini-split installation here:
Mini-Split Installation Troubleshooting and FAQs
Whether you choose a DIY mini-split installation or a professional one, you may encounter a few challenges while installing your ductless mini-split system.
Here are some common installation challenges and frequently asked questions:
Common Installation Challenges
- Refrigerant Handling: Handling refrigerant is one of the most critical aspects of mini-split installation. A common challenge is ensuring no leaks in the refrigerant lines, which can lead to system inefficiency or malfunction. Regularly check for leaks and ensure proper sealing.
- Electrical Wiring: Proper electrical connections are crucial for the system’s safety and performance. Challenges may include correctly wiring the indoor and outdoor units, ensuring adequate voltage, and preventing electrical shorts. Always follow the manufacturer’s wiring diagrams and guidelines.
- Drainage Issues: Mini-split systems generate condensate, which must drain properly. A blocked or improperly routed drain line can lead to water damage. To prevent clogs, regularly inspect and clean the drain line.
- Mounting and Placement: Incorrect positioning of the indoor and outdoor units can affect system efficiency and airflow. Ensure the indoor unit is at an optimal height and location for even cooling or heating. Place the outdoor unit on a stable surface with proper clearance for airflow.
- Communication Errors: Ductless systems usually require communication between the indoor unit(s) and the outdoor unit for temperature control. Troubleshooting communication errors may involve checking wiring, checking settings, and ensuring no remote control issues.
Common Questions about a Mini Split Installation

Do I need to hire a professional for installation?

While professional installation is recommended for safety and warranty compliance, depending on the brand or manufacturer, experienced DIYers may opt for self-installation.
How long does the installation process take?
Installation time varies but usually takes several hours to a full day, depending on system complexity.
Can I install multiple indoor units with one outdoor unit?
Yes, multi-zone systems allow you to connect multiple indoor units to a single outdoor unit, reducing installation costs.
What maintenance is required after installation?
Air filters, condenser coils, and drainage lines should be regularly cleaned and annual professional maintenance be performed.
Is a permit required for installation?
Local building codes may require permits for HVAC installations. Check with your municipality for specific requirements.
Addressing these challenges and questions proactively can help ensure a smooth mini-split installation process, allowing you to enjoy efficient heating and cooling in your space.
Have More Questions? Alpine is Your Place for Answers!
For more information about installing a ductless mini-split, contact the HVAC experts at Alpine. We can help you find the best mini-split system for your space, budget, and particular needs. Alpine has been making customers happy since 2002. We have thousands of 5-star reviews and an A+ rating from the BBB.
Blueridge ductless mini-splits–Alpine’s exclusive brand–are made to our specifications by the world’s largest, most reputable HVAC manufacturer and have the highest online product ratings of all mini-split brands. When you purchase a Blueridge mini-split from Alpine, you get:
- Wholesale pricing
- Free shipping
- The outstanding Blueridge Ductless Mini-Split Warranty
- Alpine’s Premium Guarantee, which includes:
The exceptional Blueridge Ductless Mini-Split Warranty covers five years for parts and seven years for the compressor (heat pump). Moreover, Alpine’s in-house warranty processing means support or replacement parts are just a phone call away. But here’s where the Blueridge warranty really shines: while many mini-split brands warrant their product only when installed by a licensed contractor, Blueridge’s warranty covers the do-it-yourselfers as long as the unit has been installed correctly.